Windows Gets a Linux Makeover: Install Ubuntu WSL Today!
 and ubuntu")
In this post, I will be showcasing the installation of windows linux subsystem (WSL) and Ubuntu in windows. This is a guide for installing Ubuntu for optimal performance.
What is WSL?
WSL stands for Windows Subsystem for Linux. It is a compatiblity layer developed by Microsoft that allows running native Linux command-line tools and utilites directly on Windows. WSL provides a way to run a Linux distribution, such as Ubuntu, alongside the Windows operating system without the need for virtual machines or dual-boot configurations.
Usage of WSL
Installation
For installing WSL, there are various requirements that must be fullfilled. These requirements must be met then only one must proceed with the installation.
To install WSL (Windows Subsystem for Linux) on Windows, you’ll need to meet the following requirements:
-
Operating System: Windows 10, version 1903 or later.
- Note: WSL 2 is available in Windows 10, version 2004 or later.
-
System Architecture: 64-bit Windows.
-
Enable Virtualization:
- Ensure that virtualization is enabled in your system’s BIOS settings. Some systems may refer to this feature as “Intel Virtualization Technology” (Intel VT) or “AMD Virtualization” (AMD-V).
-
Windows Update: Make sure your Windows system is up to date.
- WSL requires certain Windows updates to function correctly, so it’s recommended to have the latest updates installed.
-
Check WSL Support: Verify that your Windows version supports WSL.
- Open PowerShell as an administrator and run the command:
wsl --list --online. - If the command displays a list of available WSL distributions, your Windows version supports WSL.
- Open PowerShell as an administrator and run the command:
-
Internet Connection: Ensure you have an active internet connection during the installation process.
- WSL will download the Linux distribution from the Microsoft Store during the installation.
-
Sufficient Disk Space: Make sure you have enough free disk space to install the Linux distribution.
- The disk space requirements vary depending on the Linux distribution you choose.
- Keep in mind that these requirements are based on the general guidelines for WSL installation. Microsoft may introduce updates or changes, so it’s always a good idea to refer to the official documentation for the most up-to-date information regarding WSL installation requirements for your specific Windows version.
If these requirements are fulfilled then we can proceed with the installation.
Enable the Windows Subsystem for Linux feature:
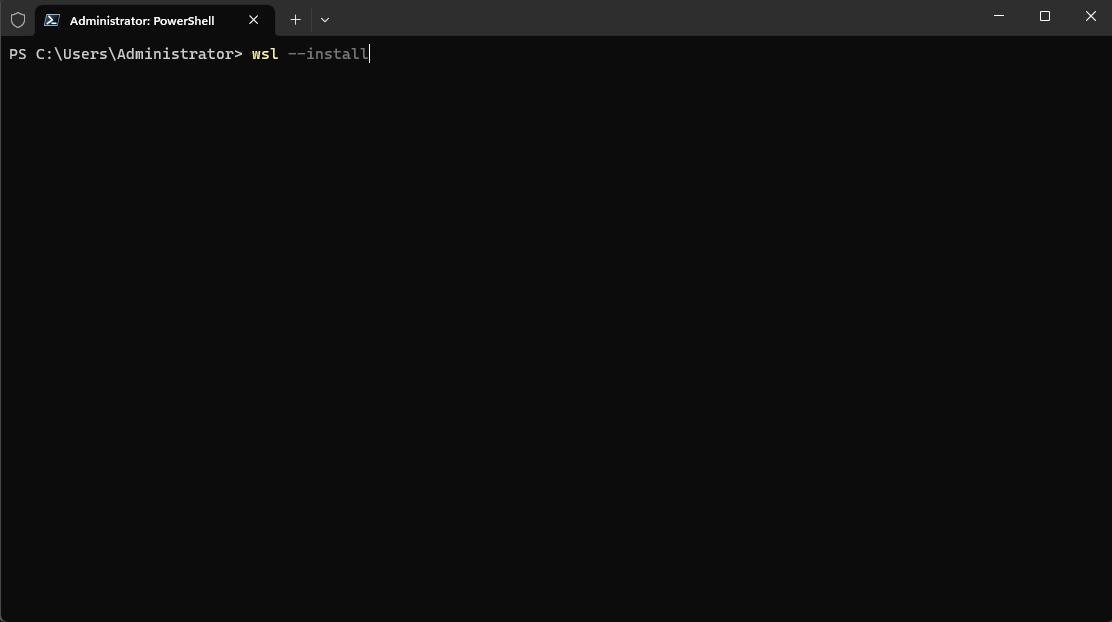
- Open PowerShell as an administrator. You can do this by right-clicking the Start button and selecting “Windows PowerShell (Admin)”.
- Run the following command:
wsl --installorwsl --install -d <distribution>(replace<distribution>with the name of the Linux distribution you want to install, such as “Ubuntu”). This command will enable WSL and install the default Linux distribution from the Microsoft Store.
Install Command - Follow any on-screen prompts and wait for the installation to complete.
- Restart the computer!
Upgrading WSL to version 2
WSL 2 is better than WSL because it utilizes a full Linux kernel within a lightweight virtual machine (VM), resulting in superior performance, improved system call compatibility, and enhanced resource utilization. The inclusion of the Linux kernel allows for faster file system operations, seamless integration of Linux applications with Windows, and an overall more powerful and efficient Linux experience on Windows machines. So, we will be upgrading to wsl 2.
- First of all, you must have installed WSL from the steps above. This is really important
- Then, you should download the latest Linux Kernal update package and install it
- Finally, you should set WSL2 as your default version. Open Powershell as Administrator and run:
wsl --set-default-version 2
Install a Linux distribution from the Microsoft Store:
- Open the Microsoft Store app on your Windows system.
- Search for the Linux distribution you want to install, such as “Ubuntu” or “Debian”. In this installation we are installing “Ubuntu” so, I’ll be installing ubuntu.
- You can also use
winget install ubuntuif it is convinient.
- You can also use
- From the search results click on Ubuntu and on the “Install” button
- Wait for the installation to complete. This may take a few minutes depending on your internet connection speed.

Set up your Linux distribution:
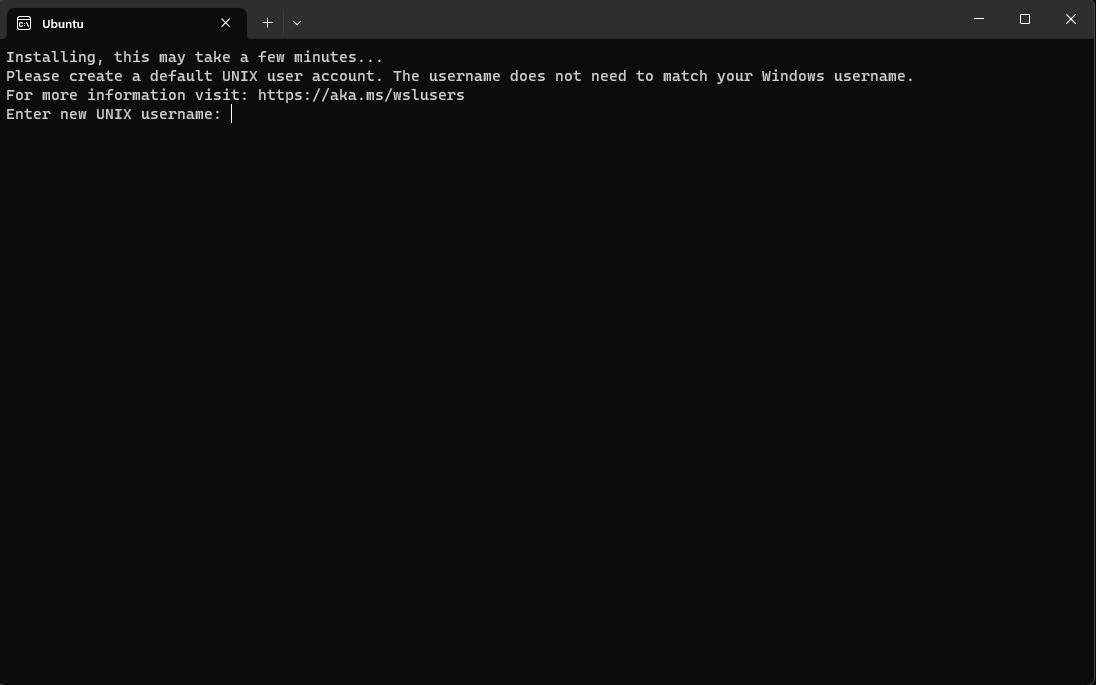
- Launch the installed Linux distribution from the Start menu or by searching for its name.
- The first time you launch it, you’ll need to wait for the installation to complete, which involves setting up the initial Linux user account and configuring the distribution.
- Follow the on-screen instructions to complete the setup.
Ubuntu Setup
Start using WSL:
- Once the setup is complete, you can use WSL by launching the Linux distribution you installed. It will open a terminal window running the Linux environment.
- You can run Linux commands, install software packages, and perform various tasks within the WSL environment.